2020年10月29日 星期四

用 PHP 與 jQuery Ajax 存取資料庫 (習題)

前陣子網友詢問如何依據輸入的身分證從資料庫中提取有效日期且可進行修改, 參考下面這篇底下的留言 :

測試 jQuery 的 Ajax 函數 $.ajax()

因我這陣子在忙 jQuery Mobile 沒時間思考, 今天稍微告一段落, 就來做一下這道習題, 順便複習一下 jQuery UI 與 PHP, 久沒做還真的會生鏽.  此測試參考了之前的文章 :

首先在 MySQL 建一個資料表 pid_valid_date, 根據網友問題描述, 需要兩個欄位 :

  • pid : varchar(10) 儲存身分證
  • valid_date : varchar(10) 儲存 YYYY-MM-DD 格式之有效日期

建資料表的 SQL 指令如下 :

--
-- 資料表結構 `pid_valid_date`
--

CREATE TABLE `pid_valid_date` (
  `pid` varchar(10) COLLATE utf8mb4_unicode_ci NOT NULL,
  `valid_date` varchar(10) COLLATE utf8mb4_unicode_ci NOT NULL
) ENGINE=InnoDB DEFAULT CHARSET=utf8mb4 COLLATE=utf8mb4_unicode_ci;

建好後輸入如下測試資料,  SQL 指令為 :

--
-- 傾印資料表的資料 `pid_valid_date`
--

INSERT INTO `pid_valid_date` (`pid`, `valid_date`) VALUES
('A123456789', '2021-02-13'),
('Q123456789', '2025-11-21'),
('S123456789', '2023-05-29'),
('T123456789', '2020-12-31');


下面是只用 HTML5+jQuery 的範例 : 


測試 1 : 使用 HTML5 原生元件 [看原始碼]

<!DOCTYPE html>
<html>
  <head>
    <title></title>
    <meta charset="utf-8">
    <meta http-equiv="cache-control" content="no-cache">
    <meta name="viewport" content="width=device-width,initial-scale=1">
    <script src="http://code.jquery.com/jquery-3.5.1.min.js"></script>
  </head>
  <body>
    <select id="pid" name="pid">
      <option value="">請選擇身分證號碼</option>
    </select>
    <input type="text" id="valid_date" name="valid_date">
    <button id="update">更新</button>
    <script>
      $(document).ready(function(){ 
        $.get({
          url: "http://tony1966.xyz/test/jquerytest/get_pid.php",
          dataType: "html",
          success: function(res) {
            $("#pid").append(res);
            }
          });
        $('#pid').on('change', function() {
          $.get({
            url: "http://tony1966.xyz/test/jquerytest/get_valid_date.php",
            dataType: "html",
            data: {pid: this.value},
            success: function(res) {
              $("#valid_date").val(res);
              }
            });
          });
        $("#update").on("click", function(e){
          $.get({
            url: "http://tony1966.xyz/test/jquerytest/update_valid_date.php",
            dataType: "text",
            data: {pid: $("#pid").val(), valid_date: $("#valid_date").val()},
            success: function(res) {alert(res);}
            });          
          });
        });
    </script>
  </body>
</html>

此例網頁中有三個元件 : 一個用來選擇身分證字號的下拉式選單, 一個用來顯示有效期限的單行文字欄位, 以及一個更新按鈕. 下拉式選單初始僅有提示用的文字選項, 身分證選項是透過 Ajax 向後端程式 get_pid.php 從資料庫取得, 此程式內容如下 : 

<?php
header('Content-Type: text/html;charset=UTF-8');
$host="mysql.hostinger.co.uk"; 
$username="u137801000_test"; 
$password="a123456"; 
$database="u137801000_test"; 
$conn=mysql_connect($host, $username, $password); 
mysql_query("SET NAMES 'utf8'"); 
mysql_select_db($database, $conn); 
$SQL="SELECT pid FROM `pid_valid_date`"; 
$result=mysql_query($SQL, $conn); 
$arr=array(); 
for ($i=0; $i < mysql_numrows($result); $i++) { 
     $row=mysql_fetch_array($result); 
     $option="<option value='".$row["pid"]."'>".$row["pid"]."</option>";
     $arr[$i]=$option; 
     } 
echo implode("\n", $arr);  
?>

此 PHP 程式會搜尋資料表 pid_valid_date 的 pid 欄位, 並在碟帶回圈中製作 option 元素組成的 HTML 回應字串, 此字串會在回應給前端網頁時傳入 append() 方法插入預設的 option 後面. 結果如下 : 


選取身分證字號會產生 change 事件並攜帶 pid 參數向後端程式 get_valid_date.php 提出 Ajax 請求, 此程式會搜尋 pid_valid_date 資料表中該 pid 的 valid_date 欄位值後傳回, 前端網頁收到回應後將其填入 valid_date 單行文字欄位中, 程式內容如下 :

<?php
header('Content-Type: text/html;charset=UTF-8');
$host="mysql.hostinger.co.uk"; 
$username="u137801000_test"; 
$password="a123456"; 
$database="u137801000_test"; 
$conn=mysql_connect($host, $username, $password); 
mysql_query("SET NAMES 'utf8'"); 
mysql_select_db($database, $conn); 
$SQL="SELECT * FROM `pid_valid_date` WHERE pid='".$_REQUEST["pid"]."'"; 
$result=mysql_query($SQL, $conn);  
$row=mysql_fetch_array($result); 
echo $row["valid_date"]; 
?>

使用者可修改 valid_date 後按更新鈕, 這會向後端程式 update_valid_date.php 提出 Ajax 請求 (攜帶 pid 與 valid_date 參數), 此程式會更新 pid 的 valid_date 欄位值, 成功傳回 OK, 失敗傳回 NG, 前端網頁收到回應後用 alert() 顯示結果, 此程式內容如下 : 

<?php
header('Content-Type: text/html;charset=UTF-8');
$host="mysql.hostinger.co.uk"; 
$username="u137801000_test"; 
$password="a123456"; 
$database="u137801000_test"; 
$conn=mysql_connect($host, $username, $password); 
mysql_query("SET NAMES 'utf8'"); 
mysql_select_db($database, $conn); 
$SQL="UPDATE `pid_valid_date` SET valid_date='".$_REQUEST["valid_date"]."' ".
     "WHERE pid='".$_REQUEST["pid"]."'"; 
$result=mysql_query($SQL, $conn);  
if (mysqli_error($conn)) {$msg="NG";}
else {$msg="OK";}
echo $msg; 
?>

測試 2 : 使用 jQueryUI 元件 [看原始碼]

<!DOCTYPE html>
<html>
  <head>
    <title></title>
    <meta charset="utf-8">
    <meta http-equiv="cache-control" content="no-cache">
    <meta name="viewport" content="width=device-width,initial-scale=1">
    <script src="http://code.jquery.com/jquery-3.5.1.min.js"></script>
    <script src="http://code.jquery.com/ui/1.12.1/jquery-ui.min.js"></script>
    <link href="http://code.jquery.com/ui/1.12.1/themes/hot-sneaks/jquery-ui.css" rel="stylesheet">
    <style>
      body {font-family: Arial, Helvetica, sans-serif;}
      .ui-widget {font-size:80%;}
    </style>
  </head>
  <body>
    <select id="pid" name="pid">
      <option value="">請選擇身分證號碼</option>
    </select>
    <input type="text" id="valid_date" name="valid_date">
    <button id="update">更新</button>
    <script>
      $(document).ready(function(){        
        $("button").button();
        $("input").addClass("ui-widget ui-widget-content ui-corner-all");
        $("input").height($("button").innerHeight());
        $("#pid").selectmenu();
        $.get({
          url: "http://tony1966.xyz/test/jquerytest/get_pid.php",
          dataType: "html",
          success: function(res) {
            $("#pid").append(res);
            }
          });
        $('#pid').on('selectmenuchange', function() {
          $.get({
            url: "http://tony1966.xyz/test/jquerytest/get_valid_date.php",
            dataType: "html",
            data: {pid: this.value},
            success: function(res) {
              $("#valid_date").val(res);
              }
            });
          });
        $("#update").on("click", function(e){
          $.get({
            url: "http://tony1966.xyz/test/jquerytest/update_valid_date.php",
            dataType: "text",
            data: {pid: $("#pid").val(), valid_date: $("#valid_date").val()},
            success: function(res) {alert(res);}
            });          
          });
        });
    </script>
  </body>
</html>

此例使用 jQueryUI 來美化頁面,下拉式選單使用 selectmenu 元件, 單行文字欄位高度也經過調整與按鈕同高, 參考 : 


程式部分基本上與上面測試 1 雷同, 結果如下 :


將將, 完成啦! 


2020年10月27日 星期二

域名 tony1966.xyz 續約一年

這幾天收到英國 Hostinger 虛擬主機寄來的 tony1966.xyz 域名續約繳費通知信, 每年都是在 11/24 日到期, 今天在測試 PHP 登入主機時順便繳費, 年費 11.99 英鎊, 以今日英鎊兌台幣匯率 37.198 元計算, 合台幣約 443 元, 約每天 1.21 元, 每月 36 元左右  : 


之前有打算放棄此域名, 直接用 Hostinger 免費但較長的域名, 後來覺得 tony1966.xyz 使用好幾年了, 雖然目前只是測試學習使用, 但我許多測試紀錄都是改用此域名, 放棄的話要全部改很費事, 那就繼續用唄. 

2020年10月26日 星期一

西海情歌

 今天在 Youtube 聽到一首好聽的歌 "西海情歌" :

西海情歌 - 降央卓玛


演唱者降央卓瑪是中國知名歌手, 有 "最美女中音" 之譽, 她的歌聲渾厚非常耐聽. 這首歌的原唱與創作者是刀郎 :

西海情歌 by 刀郎


這首歌據說是刀郎聽了一段發生在青海的淒美愛情故事後寫下的, 參考 :

青雲轉述「西海情歌」的故事

雖然是很久的歌了, 但對我而言是新歌, 而且好歌都非常耐聽. 

2020年10月25日 星期日

2020 年第 43 周記事

今天獅形頂神農大帝誕辰, 中午我與爸出席午宴, 11 點多到達時車位已不好停, 只好停在山路邊. 鄉下目前老化嚴重, 出席者以老者居多, 廟會也是鄉下老人家的聚會活動之一. 

夏季所種約八株絲瓜收成到今日全部用完, 還好榮彩伯母早上拿了一大袋油菜與白菜過來, 故下周還有菜可用. 早上去市集回途經種子行買了 40 株大陸妹, 30 株菠菜, 3 株絲瓜, 傍晚之前全都種好了, 但只用掉一畦菜圃, 下周再買 30 株大陸妹來種. 我的秋天種菜活動本周開始了! 

同事週三拿了一堆食品展入場券到辦公室, 跟他拿了三張週六早上去, 想說好久沒去總圖了, 順便去找一些書 (其實是倒過來, 我對食品展沒多少興趣, 找書才是目的). 但展場逛了一圈試吃了一些東西, 覺得很無趣就出來了, 只有在一個攤位上看到展出的可可豆, 原來原豆這麼大顆!


不過去總圖也沒找到什麼書, 大老遠跑去卻空手而歸覺得很失望, 浪費時間.  

週六晚上小雖貓又跳上我書房的窗檯上喵喵叫 (它似乎知道我睡哪間), 我打開前門讓它進屋瞧瞧, 第一次進屋好像劉姥姥進大觀園, 很好奇地這裡聞那裏聞 : 


傍晚我在種菜它又跑來菜園搗亂, 我在菜圃上挖好一個一個洞準備種大陸妹, 它給我在洞裡小便然後習慣性地填平, 害我又要重挖, 這小子真是令人又好氣又好笑.

周三醫院通知阿蘭可出院, 仍由機構代勞並墊付款項, 住院 13 天共 20239 元, 我今日已前往償付, 剛好遇到重陽節有活動. 關於導尿管置換週期問題, 機構護理師已回覆乃每周更換, 我原先以為每月換為錯誤印象. 

周四我的 Swift 5 筆電又在 Win10 更新後無法顯示 WiFi 熱點, 系統復原我又選錯還原點 (不要選有 Update 字眼者, 要選這次更新前的那個), 使得測試進度空轉一天, 不過還是努力加把勁, 終於在本周結束 jQuery Mobile 主體的測試, 希望下周能開始測試 Cordova. 

日劇 "東京愛情故事2020" 快看完了 (9/11), 重溫多年前的故事感覺很不錯! 1992 年播放的舊劇正是我二度上台北工作時看的, 快 30 年前了, 當時的很多事都逐漸模糊, 漸漸失去真實感. 上週在鄉下家樓上整理東西時翻出以前的日記, 整本看完驚訝地發現~~~我幹過這些事嗎 (哪來的勇氣)? 該不會是選擇性失憶吧? 

jQuery Mobile 學習筆記 (十) : 表單元件 (下)

本篇紀錄剩餘的 HTML5 表單元件 number 與 color 之測試, 本系列之前的文章參考 :

jQuery Mobile 學習筆記 (三) : 工具列
jQuery Mobile 學習筆記 (四) : 對話框


關於 HTML5 表單參考 :

網頁技術速學筆記 (四) : HTML 表單

首先是只能輸入數值的 number 元件測試 :


測試 4-6 : HTML5 原生的數值輸入元件 input[type=number] [看原始碼]

<!DOCTYPE html>
<html>
  <head>
    <title></title>
    <meta charset="utf-8">
    <meta http-equiv="cache-control" content="no-cache">
    <meta name="viewport" content="width=device-width,initial-scale=1">
    <script src="https://code.jquery.com/jquery-1.11.1.min.js"></script>
    <script src="https://code.jquery.com/mobile/1.4.5/jquery.mobile-1.4.5.min.js"></script>
    <link href="https://code.jquery.com/mobile/1.4.5/jquery.mobile-1.4.5.min.css" rel="stylesheet">
  </head>
  <body>
    <!-- 第一頁頁面 -->
    <section data-role="page" id="page1">
      <header data-role="header">
        <h1>表單元件測試</h1>
      </header>
      <article data-role="content">
        <form method="post" action="http://tony1966.xyz/test/jqmtest/form_test_4_6.php">
          <div data-role="fieldcontain">
            <label for="income">月入 :</label>
            <input type="number" id="income" name="income" min="0" max="300000" value="26000" step="1000">
          </div>
          <div data-role="fieldcontain">
            <button id="ok_btn">確定</button>
          </div>
        </form>
      </article>
      <footer data-role="footer">
        <h3>頁尾</h3>
      </footer>
      <script>
        $(document).on("pageinit", "#page1", function(e) {
          $("#ok_btn").on("click", function(e) {
            var msg="月入=" + $("#income").val();
            alert(msg);
            this.form.submit();
            });
          });
      </script>
    </section>
  </body>
</html>

此例之 number 元件雖然外觀與 type=text 的單行文字輸入一樣, 但 number 只能輸入數字與小數點, 輸入文字無反應. 在 PC 上用 Chrome 測試時點擊輸入框時右側會出現上下小按鈕, 點一下會依據 step 屬性值為步階上下跳動, 但 Android 上的 Chrome 卻沒有上下調整的小按鈕, 因此 step 屬性無作用, 需完整輸入數值, 結果如下 : 


按確定會向後端程式 form_test_4_6.php 提交表單, 其內容如下 : 

<!DOCTYPE html>
<html>
  <head>
    <title></title>
    <meta charset="utf-8">
    <meta http-equiv="cache-control" content="no-cache">
    <meta name="viewport" content="width=device-width,initial-scale=1">
    <script src="https://code.jquery.com/jquery-1.11.1.min.js"></script>
    <script src="https://code.jquery.com/mobile/1.4.5/jquery.mobile-1.4.5.min.js"></script>
    <link href="https://code.jquery.com/mobile/1.4.5/jquery.mobile-1.4.5.min.css" rel="stylesheet">
  </head>
  <body>
    <!-- 第一頁頁面 -->
    <section data-role="page" id="page1">
      <header data-role="header">
        <h1>表單元件測試</h1>
      </header>
      <article data-role="content">
      <?php
        $msg="月入=".$_REQUEST["income"];
        echo $msg;
      ?>
      </article>
      <footer data-role="footer">
        <h3>頁尾</h3>
      </footer>
    </section>
  </body>
</html>


此例網址 QR code 如下 :


最後是 color 元件, 用來從調色盤中挑選色彩值, 其設定值為例如 "#2a0c1d" 的色彩值 : 


測試 4-7 : HTML5 原生的色彩選擇元件 input[type=color] [看原始碼]

<!DOCTYPE html>
<html>
  <head>
    <title></title>
    <meta charset="utf-8">
    <meta http-equiv="cache-control" content="no-cache">
    <meta name="viewport" content="width=device-width,initial-scale=1">
    <script src="https://code.jquery.com/jquery-1.11.1.min.js"></script>
    <script src="https://code.jquery.com/mobile/1.4.5/jquery.mobile-1.4.5.min.js"></script>
    <link href="https://code.jquery.com/mobile/1.4.5/jquery.mobile-1.4.5.min.css" rel="stylesheet">
  </head>
  <body>
    <!-- 第一頁頁面 -->
    <section data-role="page" id="page1">
      <header data-role="header">
        <h1>表單元件測試</h1>
      </header>
      <article data-role="content">
        <form method="post" action="http://tony1966.xyz/test/jqmtest/form_test_4_7.php">
          <div data-role="fieldcontain">
            <label for="set_color">顏色設定</label>
            <input type="color"  value="#ff0000">
          </div>
          <div data-role="fieldcontain">
            <button id="ok_btn">確定</button>
          </div>
        </form>
      </article>
      <footer data-role="footer">
        <h3>頁尾</h3>
      </footer>
      <script>
        $(document).on("pageinit", "#page1", function(e) {
          $("#ok_btn").on("click", function(e) {
            alert("設定顏色=" + $("#set_color").val());
            this.form.submit();
            });
          });
      </script>
    </section>
  </body>
</html>

此例用 value 屬性值 "#ff0000" 將調色盤預設為紅色, 會顯示在中間的色條中, 點按色條會彈出選取顏色快取視窗 : 


若快取選單中無所要之顏色, 可按 "更多" 自選顏色 : 


移動滑桿設定想要的顏色 (結果顯示在右上角的色塊中), 按 "設定" 即可 : 


按確定會向後端程式 form_test_4_7.php 提交表單, 其內容如下 : 

<!DOCTYPE html>
<html>
  <head>
    <title></title>
    <meta charset="utf-8">
    <meta http-equiv="cache-control" content="no-cache">
    <meta name="viewport" content="width=device-width,initial-scale=1">
    <script src="https://code.jquery.com/jquery-1.11.1.min.js"></script>
    <script src="https://code.jquery.com/mobile/1.4.5/jquery.mobile-1.4.5.min.js"></script>
    <link href="https://code.jquery.com/mobile/1.4.5/jquery.mobile-1.4.5.min.css" rel="stylesheet">
  </head>
  <body>
    <!-- 第一頁頁面 -->
    <section data-role="page" id="page1">
      <header data-role="header">
        <h1>表單元件測試</h1>
      </header>
      <article data-role="content">
      <?php
        $msg="設定顏色=".$_REQUEST["set_color"];
        echo $msg;
      ?>
      </article>
      <footer data-role="footer">
        <h3>頁尾</h3>
      </footer>
    </section>
  </body>
</html>


此例網址 QR code 如下 :


OK, 終於測完全部表單元件了. 

2020年10月23日 星期五

市圖還書 4 本

 本周市圖還書 4 本 :

  1. 外掛Out!jQuery高手精技
  2. HTML5+CSS3+jQuery Mobile :輕鬆打造App與行動網站
  3. jQuery Mobile智慧型手機程式開發 :跨平臺開發Android/iPhone/Windows Phone App超簡單
  4. 我畢業五年, 用ETF賺到400萬 : 每月1, 000元就能開始!不用兼差斜槓, 兩檔ETF投資組合, 年賺20%以上 /

隨著 jQuery Mobile 測試近尾聲, 所借書籍最近要逐一還回去. 


jQuery Mobile 學習筆記 (九) : 網格排版

 本篇紀錄網格排版測試, 本系列之前的文章參考 :

jQuery Mobile 學習筆記 (三) : 工具列
jQuery Mobile 學習筆記 (四) : 對話框


jQuery Mobile 提供四種網格樣式類別以支援 CSS3 多欄版面配置 : 
  • ui-grid-a : 兩欄版面
  • ui-grid-b : 三欄版面
  • ui-grid-c : 四欄版面
  • ui-grid-d : 五欄版面
因為最多支援五欄版面, 因此 jQuery Mobile 提供了 ui-block-a/b/c/d/e 五個樣式類別給每一個欄位的容器使用, 結構如下圖所示 : 


兩欄網格之網頁結構 (1*2) :

<div class="ui-grid-a">
  <div class="ui-block-a">第1列第1欄</div>
  <div class="ui-block-b">第1列第2欄</div>
</div>

三欄網格之網頁結構 (1*3) : 

<div class="ui-grid-b">
  <div class="ui-block-a">第1列第1欄</div>
  <div class="ui-block-b">第1列第2欄</div>
  <div class="ui-block-c">第1列第3欄</div>
</div>

四欄網格之網頁結構 (1*4) : 

<div class="ui-grid-c">
  <div class="ui-block-a">第1列第1欄</div>
  <div class="ui-block-b">第1列第2欄</div>
  <div class="ui-block-c">第1列第3欄</div>  
  <div class="ui-block-d">第1列第4欄</div>
</div>

五欄網格之網頁結構 (1*5) : 

<div class="ui-grid-c">
  <div class="ui-block-a">第1列第1欄</div>
  <div class="ui-block-b">第1列第2欄</div>
  <div class="ui-block-c">第1列第3欄</div>  
  <div class="ui-block-d">第1列第4欄</div>
  <div class="ui-block-e">第1列第5欄</div>
</div>

以上結構都是 1*n (1 列 n 欄), 多列排版只要重複 ui-block 樣式即可, 例如 2 列 2 欄為 : 

<div class="ui-grid-a">
  <div class="ui-block-a">第1列第1欄</div>
  <div class="ui-block-b">第1列第2欄</div>
  <div class="ui-block-a">第2列第1欄</div>
  <div class="ui-block-b">第2列第2欄</div>
</div>

第二次出現的 ui-block-a/b 為第二列, 第三次為第三列, 其餘依此類推. 

例如 : 


<!DOCTYPE html>
<html>
  <head>
    <title></title>
    <meta charset="utf-8">
    <meta http-equiv="cache-control" content="no-cache">
    <meta name="viewport" content="width=device-width,initial-scale=1">
    <script src="https://code.jquery.com/jquery-1.11.1.min.js"></script>
    <script src="https://code.jquery.com/mobile/1.4.5/jquery.mobile-1.4.5.min.js"></script>
    <link href="https://code.jquery.com/mobile/1.4.5/jquery.mobile-1.4.5.min.css" rel="stylesheet">
  </head>
  <body>
    <!-- 第一頁頁面 -->
    <section data-role="page" id="page1">
      <header data-role="header">
        <h1>網格排版測試</h1>
      </header>
      <article data-role="content">
        <div class="ui-grid-a">
          <div class="ui-block-a">
            <a href="#" data-role="button" data-icon="action">動作</a>
            <a href="#" data-role="button" data-icon="alert">注意</a>
            <a href="#" data-role="button" data-icon="arrow-l">左箭頭</a>
            <a href="#" data-role="button" data-icon="arrow-u">上箭頭</a>
          </div>
          <div class="ui-block-b">
            <a href="#" data-role="button" data-icon="arrow-d">下箭頭</a>        
            <a href="#" data-role="button" data-icon="arrow-d-l">下左箭頭</a>
            <a href="#" data-role="button" data-icon="arrow-d-r">下右箭頭</a>
            <a href="#" data-role="button" data-icon="arrow-r">右箭頭</a>
          </div>
        </div>
      </article>
      <footer data-role="footer">
        <h3>頁尾</h3>
      </footer>
    </section>
  </body>
</html>

此例在兩個欄位中各放置 4 個按鈕, 結果如下 : 


此例網址 QR code 如下 :


下面是三欄的網格版面範例 : 


<!DOCTYPE html>
<html>
  <head>
    <title></title>
    <meta charset="utf-8">
    <meta http-equiv="cache-control" content="no-cache">
    <meta name="viewport" content="width=device-width,initial-scale=1">
    <script src="https://code.jquery.com/jquery-1.11.1.min.js"></script>
    <script src="https://code.jquery.com/mobile/1.4.5/jquery.mobile-1.4.5.min.js"></script>
    <link href="https://code.jquery.com/mobile/1.4.5/jquery.mobile-1.4.5.min.css" rel="stylesheet">
  </head>
  <body>
    <!-- 第一頁頁面 -->
    <section data-role="page" id="page1">
      <header data-role="header">
        <h1>網格排版測試</h1>
      </header>
      <article data-role="content">
        <div class="ui-grid-b">
          <div class="ui-block-a">
            <a href="#" data-role="button" data-icon="action">動作</a>
            <a href="#" data-role="button" data-icon="alert">注意</a>
            <a href="#" data-role="button" data-icon="arrow-l">左箭頭</a>
            <a href="#" data-role="button" data-icon="arrow-u">上箭頭</a>
          </div>
          <div class="ui-block-b">
            <a href="#" data-role="button" data-icon="arrow-d">下箭頭</a>        
            <a href="#" data-role="button" data-icon="arrow-d-l">下左箭頭</a>
            <a href="#" data-role="button" data-icon="arrow-d-r">下右箭頭</a>
            <a href="#" data-role="button" data-icon="arrow-r">右箭頭</a>
          </div>
          <div class="ui-block-c">
            <a href="#" data-role="button" data-icon="arrow-u-l">上左箭頭</a>
            <a href="#" data-role="button" data-icon="arrow-u-r">上右箭頭</a>
            <a href="#" data-role="button" data-icon="audio">音訊</a>
            <a href="#" data-role="button" data-icon="back">返回</a>
          </div>
        </div>
      </article>
      <footer data-role="footer">
        <h3>頁尾</h3>
      </footer>
    </section>
  </body>
</html>

結果如下 : 


此例網址 QR code 如下 :


注意, 上例雖然看起來似乎是 4*3 版面, 其實是 1*3, 每欄的四個按鈕是放在一列中. 如果要改成 4*3 要改成如下 : 


<!DOCTYPE html>
<html>
  <head>
    <title></title>
    <meta charset="utf-8">
    <meta http-equiv="cache-control" content="no-cache">
    <meta name="viewport" content="width=device-width,initial-scale=1">
    <script src="https://code.jquery.com/jquery-1.11.1.min.js"></script>
    <script src="https://code.jquery.com/mobile/1.4.5/jquery.mobile-1.4.5.min.js"></script>
    <link href="https://code.jquery.com/mobile/1.4.5/jquery.mobile-1.4.5.min.css" rel="stylesheet">
  </head>
  <body>
    <!-- 第一頁頁面 -->
    <section data-role="page" id="page1">
      <header data-role="header">
        <h1>網格排版測試</h1>
      </header>
      <article data-role="content">
        <div class="ui-grid-b">
          <div class="ui-block-a">
            <a href="#" data-role="button" data-icon="action">動作</a>
          </div>
          <div class="ui-block-b">
            <a href="#" data-role="button" data-icon="arrow-d">下箭頭</a>  
          </div>
          <div class="ui-block-c">
            <a href="#" data-role="button" data-icon="arrow-u-l">上左箭頭</a>
          </div>
          <div class="ui-block-a">
            <a href="#" data-role="button" data-icon="alert">注意</a>
          </div>
          <div class="ui-block-b"> 
            <a href="#" data-role="button" data-icon="arrow-d-r">下右箭頭</a>
          </div>
          <div class="ui-block-c">
            <a href="#" data-role="button" data-icon="arrow-u-r">上右箭頭</a>
          </div>
          <div class="ui-block-a">
            <a href="#" data-role="button" data-icon="arrow-l">左箭頭</a>
          </div>
          <div class="ui-block-b"> 
            <a href="#" data-role="button" data-icon="arrow-d-l">下左箭頭</a>
          </div>
          <div class="ui-block-c">
            <a href="#" data-role="button" data-icon="audio">音訊</a>
          </div>
          <div class="ui-block-a">
            <a href="#" data-role="button" data-icon="arrow-u">上箭頭</a>
          </div>
          <div class="ui-block-b"> 
            <a href="#" data-role="button" data-icon="arrow-r">右箭頭</a>
          </div>
          <div class="ui-block-c">
            <a href="#" data-role="button" data-icon="back">返回</a>
          </div>
        </div>
      </article>
      <footer data-role="footer">
        <h3>頁尾</h3>
      </footer>
    </section>
  </body>
</html>

此例 ui-block-a/b/c 重複四次, 因此為 4 列 3 行版面, 結果如下 :


雖然結果與上面測試 2 一樣, 但實際上兩者版面結構不同, 上例是 1*3 網格, 此例為 4*3 網格. 此例網址 QR code 如下 :


I Found Myself

最近愛奇藝沒有想看的韓劇, 就隨便找了一部日劇 "東京愛情故事 2020" 來看, 咦, 這跟以前的那部故事不同嗎? 看第一集才知是 2020 年重拍的, 以前演健三的是長髮帥氣的江口洋介, 演完治的是織田裕二, 演莉香的則是鈴木保奈美 :

# 東京愛情故事

真的太懷舊了. 這部新拍的東京愛情故事劇中配樂 "I Found Myself" 雖然很短, 但還蠻好聽的, 但關於演唱者的資料卻很少, 從臉書資訊中很多西里爾字看似乎與烏克蘭有淵源. 

ZEFEAR × Teya Flow - I Found Myself


歌詞 :

I’m waiting for the night And I don’t realize That I’m falling, I’m falling. I still see your light And I know – you’ll be mine If I’m calling, I’m calling. So many days I have to pray! Oh God! I found myself in you, baby I found myself. All nights and days I have to pray! Oh God! I found myself in you, baby I found myself.

https://www.bilibili.com/s/video/BV1oe411p7MS

2020年10月22日 星期四

jQuery Mobile 學習筆記 (八) : 摺疊面板

本篇紀錄摺疊面板 (accordion) 測試. 本系列之前的文章參考 :

jQuery Mobile 學習筆記 (三) : 工具列
jQuery Mobile 學習筆記 (四) : 對話框


摺疊面板的最基本結構是一個可收合的 div 容器, 裡面含有作為標題的 h1~h6 元素以及作為內容的 p 元素, 透過在 div 元素上添加 data-role="collapsible" 屬性使其變成可收合之摺疊面板 : 

<div data-role="collapsible">
  <h3>標題</h3>
  <p>內容</p>
</div>

其中 p 元素所包覆之內容部分預設會被收合隱藏, 而 h1~h6 元素所包覆之標題會被繪製成一個含有加號 "+" 圖示的按鈕, 按此按鈕會將內容展開, 按鈕圖示也會改成減號 "-" 圖示. 例如 : 


<!DOCTYPE html>
<html>
  <head>
    <title></title>
    <meta charset="utf-8">
    <meta http-equiv="cache-control" content="no-cache">
    <meta name="viewport" content="width=device-width,initial-scale=1">
    <script src="https://code.jquery.com/jquery-1.11.1.min.js"></script>
    <script src="https://code.jquery.com/mobile/1.4.5/jquery.mobile-1.4.5.min.js"></script>
    <link href="https://code.jquery.com/mobile/1.4.5/jquery.mobile-1.4.5.min.css" rel="stylesheet">
  </head>
  <body>
    <!-- 第一頁頁面 -->
    <section data-role="page" id="page1">
      <header data-role="header">
        <h1>摺疊面板測試</h1>
      </header>
      <article data-role="content">
        <div data-role="collapsible">
          <h3>相思(王維)</h3>
          <p>紅豆生南國, 春來發幾枝<br>願君多採擷, 此物最相思</p>
        </div>
        <div data-role="collapsible">
          <h3>靜夜思(李白)</h3>
          <p>床前明月光, 疑似地上霜<br>舉頭望明月, 低頭思故鄉</p>
        </div>
        <div data-role="collapsible">
          <h3>秋浦歌(李白)</h3>
          <p>白髮三千丈, 緣愁似個長<br>不知明鏡里, 何處得秋霜</p>
        </div>
        <div data-role="collapsible">
          <h3>獨坐敬亭山(李白)</h3>
          <p>眾鳥高飛盡, 孤雲獨去閒<br>相看兩不厭, 只有敬亭山</p>
        </div>
      </article>
      <footer data-role="footer">
        <h3>頁尾</h3>
      </footer>
    </section>
  </body>
</html>

此例用折疊面板來收納唐詩, 結果如下 : 


此例網址 QR code 為 :


上面的範例中, 每一個區塊預設都是收合的, 如果要強制將某個區塊預設改為展開可添加 data-collapsed="false" 屬性 (亦即, 沒有此屬性相當於設為 collapsed="true" 收合狀態) :


<!DOCTYPE html>
<html>
  <head>
    <title></title>
    <meta charset="utf-8">
    <meta http-equiv="cache-control" content="no-cache">
    <meta name="viewport" content="width=device-width,initial-scale=1">
    <script src="https://code.jquery.com/jquery-1.11.1.min.js"></script>
    <script src="https://code.jquery.com/mobile/1.4.5/jquery.mobile-1.4.5.min.js"></script>
    <link href="https://code.jquery.com/mobile/1.4.5/jquery.mobile-1.4.5.min.css" rel="stylesheet">
  </head>
  <body>
    <!-- 第一頁頁面 -->
    <section data-role="page" id="page1">
      <header data-role="header">
        <h1>摺疊面板測試</h1>
      </header>
      <article data-role="content">
        <div data-role="collapsible" data-collapsed="false">
          <h3>相思(王維)</h3>
          <p>紅豆生南國, 春來發幾枝<br>願君多採擷, 此物最相思</p>
        </div>
        <div data-role="collapsible" data-collapsed="false">
          <h3>靜夜思(李白)</h3>
          <p>床前明月光, 疑似地上霜<br>舉頭望明月, 低頭思故鄉</p>
        </div>
        <div data-role="collapsible">
          <h3>秋浦歌(李白)</h3>
          <p>白髮三千丈, 緣愁似個長<br>不知明鏡里, 何處得秋霜</p>
        </div>
        <div data-role="collapsible">
          <h3>獨坐敬亭山(李白)</h3>
          <p>眾鳥高飛盡, 孤雲獨去閒<br>相看兩不厭, 只有敬亭山</p>
        </div>
      </article>
      <footer data-role="footer">
        <h3>頁尾</h3>
      </footer>
    </section>
  </body>
</html>

此例將前兩個區塊用 data-collapsed="false" 強制打開, 結果如下 :


此例網址 QR code 為 :


上面兩個範例中的每一個可折疊區塊都是獨立的, 亦即展開與縮合都互不相干. 如果要製作具有手風琴 (accordion) 效果的容器就要在這些可折疊區塊外面再包覆一層 div 元素, 並且添加 data-role="collapsible-set" 屬性以便將裡面的所有可折疊區塊綁在一起, 當其中一個展開時, 其他區塊都縮合, 網頁結構如下 : 

<div data-role="collapsible-set">
  <div data-role="collapsible">
    <h3>標題</h3>
    <p>內容</p>
  </div>
</div>

例如可將上面範例改成如下具有手風琴效果的折疊面板 :


<!DOCTYPE html>
<html>
  <head>
    <title></title>
    <meta charset="utf-8">
    <meta http-equiv="cache-control" content="no-cache">
    <meta name="viewport" content="width=device-width,initial-scale=1">
    <script src="https://code.jquery.com/jquery-1.11.1.min.js"></script>
    <script src="https://code.jquery.com/mobile/1.4.5/jquery.mobile-1.4.5.min.js"></script>
    <link href="https://code.jquery.com/mobile/1.4.5/jquery.mobile-1.4.5.min.css" rel="stylesheet">
  </head>
  <body>
    <!-- 第一頁頁面 -->
    <section data-role="page" id="page1">
      <header data-role="header">
        <h1>摺疊面板測試</h1>
      </header>
      <article data-role="content">
        <div data-role="collapsible-set">
          <div data-role="collapsible">
            <h3>相思(王維)</h3>
            <p>紅豆生南國, 春來發幾枝<br>願君多採擷, 此物最相思</p>
          </div>
          <div data-role="collapsible">
            <h3>靜夜思(李白)</h3>
            <p>床前明月光, 疑似地上霜<br>舉頭望明月, 低頭思故鄉</p>
          </div>
          <div data-role="collapsible">
            <h3>秋浦歌(李白)</h3>
            <p>白髮三千丈, 緣愁似個長<br>不知明鏡里, 何處得秋霜</p>
          </div>
          <div data-role="collapsible">
            <h3>獨坐敬亭山(李白)</h3>
            <p>眾鳥高飛盡, 孤雲獨去閒<br>相看兩不厭, 只有敬亭山</p>
          </div>
        </div>
      </article>
      <footer data-role="footer">
        <h3>頁尾</h3>
      </footer>
    </section>
  </body>
</html>

此例是在上面範例的可折疊面板外面再套一層具有 data-role="collapsible-set" 屬性的 div 元素來約束每一個可折疊面板同時只有一個開啟, 其餘全部收合, 結果如下 : 


此例網址 QR code 為 :


2020年10月21日 星期三

jQuery Mobile 學習筆記 (七) : 表單元件 (中)

 因為表單元件太多了, 所以把後半部拆到這篇來. 本系列之前的文章參考 :


三. 滑桿元件 : 

滑桿元件使用 HTML5 原生的 input[type=range] 元素 : 

<input type="range" name="slider" min="0" max="100" step="5" value="0">

參考 :


其中 min 與 max 屬性用來設定滑桿數值上下限, step 屬性用來設定步階值 (預設為 1), 而 value 屬性則是用來設定初始值. 繪製時除了滑桿外前面還會有一個較短的文字欄位顯示即時的滑桿數值, 而且焦點在這個文字欄位上按上下鍵也可以調整滑桿的位置與數值. 此外也可以加上 jQuery Mobile 提供的 data-highlight="true" 來凸顯目前的滑桿位置 :

<input type="range" name="slider" min="0" max="100" step="5" value="0" data-highlight="true">

也可以用具有 data-role="rangeslider" 屬性的 div 元素包覆兩個 range 元素來製作雙柄滑桿 (range slider) : 

<div data-role="rangeslider">
  <input type="range" name="slidera" min="0" max="100" step="5" value="20">
  <input type="range" name="sliderb" min="0" max="100" step="5" value="80">
</div>

例如 :


測試 3-1 : 單柄滑桿 [看原始碼]

<!DOCTYPE html>
<html>
  <head>
    <title></title>
    <meta charset="utf-8">
    <meta http-equiv="cache-control" content="no-cache">
    <meta name="viewport" content="width=device-width,initial-scale=1">
    <script src="https://code.jquery.com/jquery-1.11.1.min.js"></script>
    <script src="https://code.jquery.com/mobile/1.4.5/jquery.mobile-1.4.5.min.js"></script>
    <link href="https://code.jquery.com/mobile/1.4.5/jquery.mobile-1.4.5.min.css" rel="stylesheet">
  </head>
  <body>
    <!-- 第一頁頁面 -->
    <section data-role="page" id="page1">
      <header data-role="header">
        <h1>表單元件測試</h1>
      </header>
      <article data-role="content">
        <form method="post" action="http://tony1966.xyz/test/jqmtest/form_test_3_1.php">
          <div data-role="fieldcontain">
            <label for="slider1">單柄滑桿1</label>
            <input type="range" id="slider1" name="slider1" min="0" max="30">
          </div>
          <div data-role="fieldcontain">
            <label for="slider1">單柄滑桿2</label>
            <input type="range" id="slider2" name="slider2" min="0" max="30" step="2" data-highlight="true">
          </div>
          <button id="ok_btn">確定</button>
        </form>
      </article>
      <footer data-role="footer">
        <h3>頁尾</h3>
      </footer>
      <script>
        $(document).on("pageinit", "#page1", function(e) {
          $("#ok_btn").on("click", function(e) {
            this.form.submit();
            });
          });
      </script>
    </section>
  </body>
</html>

此例中有兩個滑桿, 第一個沒有 step 屬性預設為 1, 第二個添加了 data-highlight="true" 屬性, 拉動滑桿時左側會變成藍色, 結果如下 :


按確定會將表單提交給後端程式 form_test_3_1.php 處理並輸出 jQuery Mobile 網頁, 程式如下 :

<!DOCTYPE html>
<html>
  <head>
    <title></title>
    <meta charset="utf-8">
    <meta http-equiv="cache-control" content="no-cache">
    <meta name="viewport" content="width=device-width,initial-scale=1">
    <script src="https://code.jquery.com/jquery-1.11.1.min.js"></script>
    <script src="https://code.jquery.com/mobile/1.4.5/jquery.mobile-1.4.5.min.js"></script>
    <link href="https://code.jquery.com/mobile/1.4.5/jquery.mobile-1.4.5.min.css" rel="stylesheet">
  </head>
  <body>
    <!-- 第一頁頁面 -->
    <section data-role="page" id="page1">
      <header data-role="header">
        <h1>表單元件測試</h1>
      </header>
      <article data-role="content">
      <?php
        $msg="滑桿1=".$_REQUEST["slider1"]."<br>".
             "滑桿2=".$_REQUEST["slider2"];
        echo $msg;
      ?>
      </article>
      <footer data-role="footer">
        <h3>頁尾</h3>
      </footer>
    </section>
  </body>
</html>


此例網址 QR code 如下 :


下面範例為利用滑桿製作的調色盤 :


<!DOCTYPE html>
<html>
  <head>
    <title></title>
    <meta charset="utf-8">
    <meta http-equiv="cache-control" content="no-cache">
    <meta name="viewport" content="width=device-width,initial-scale=1">
    <script src="https://code.jquery.com/jquery-1.11.1.min.js"></script>
    <script src="https://code.jquery.com/mobile/1.4.5/jquery.mobile-1.4.5.min.js"></script>
    <link href="https://code.jquery.com/mobile/1.4.5/jquery.mobile-1.4.5.min.css" rel="stylesheet">
  </head>
  <body>
    <!-- 第一頁頁面 -->
    <section data-role="page" id="page1">
      <header data-role="header">
        <h1>表單元件測試</h1>
      </header>
      <article data-role="content">
        <form method="post" action="http://tony1966.xyz/test/jqmtest/form_test_3_2.php">
          <div data-role="fieldcontain">
            <label for="R">R</label>
            <input type="range" id="R" name="R" min="0" max="255" step="1" value="0">
          </div>
          <div data-role="fieldcontain">
            <label for="G">G</label>
            <input type="range" id="G" name="G" min="0" max="255" step="1" value="0">
          </div>
          <div data-role="fieldcontain">
            <label for="B">B</label>
            <input type="range" id="B" name="B" min="0" max="255" step="1" value="0">
          </div>
          <button id="ok_btn">確定</button>
        </form>
        <div id="canvas" style="height:50px;"></div>
      </article>
      <footer data-role="footer">
        <h3>頁尾</h3>
      </footer>
      <script>
        $(document).on("pageinit", "#page1", function(e) {
          //$("#R,#G,#B").val(0);
          $("#R,#G,#B").on("change", function(e) {
            var R=$("#R").val();
            var G=$("#G").val();
            var B=$("#B").val();
            var bgcolor="rgb(" + R + "," + G + "," + B + ")";
            $("#canvas").css("background-color", bgcolor);
            });
          $("#ok_btn").on("click", function(e) {
            this.form.submit();
            });
          });
      </script>
    </section>
  </body>
</html>

此例在頁面中放置了三個滑桿用來調整 R, G, B 顏色值 (用 min 與 max 屬性設定範圍在 0~255, 用 step 屬性設定滑動時數值變化步階為 1), 同時用 value 屬性設定滑桿的初始值為 0 (也可以在初始化時用 jQuery 程式設定). 在表單底下放置了一個 div 元素作為調色盤, 滑桿移動時會觸發 change 事件, 在 Javascript 程式中用群組選擇器 $("#R, #G, #B") 取得這三個滑桿元件後綁定 change 事件, 用 css() 方法即時更新調色盤之底色, 結果如下 : 


按確定鈕提交表單給後端程式 form_test_3_2.php 處理, 此程式內容為 : 

<!DOCTYPE html>
<html>
  <head>
    <title></title>
    <meta charset="utf-8">
    <meta http-equiv="cache-control" content="no-cache">
    <meta name="viewport" content="width=device-width,initial-scale=1">
    <script src="https://code.jquery.com/jquery-1.11.1.min.js"></script>
    <script src="https://code.jquery.com/mobile/1.4.5/jquery.mobile-1.4.5.min.js"></script>
    <link href="https://code.jquery.com/mobile/1.4.5/jquery.mobile-1.4.5.min.css" rel="stylesheet">
  </head>
  <body>
    <!-- 第一頁頁面 -->
    <section data-role="page" id="page1">
      <header data-role="header">
        <h1>表單元件測試</h1>
      </header>
      <article data-role="content">
      <?php
        $msg="R=".$_REQUEST["R"]."<br>G=".$_REQUEST["G"]."<br>B=".$_REQUEST["B"];
        echo $msg;
      ?>
      </article>
      <footer data-role="footer">
        <h3>頁尾</h3>
      </footer>
    </section>
  </body>
</html>


此例網址 QR code 如下 :


四. 日期時間元件 : 

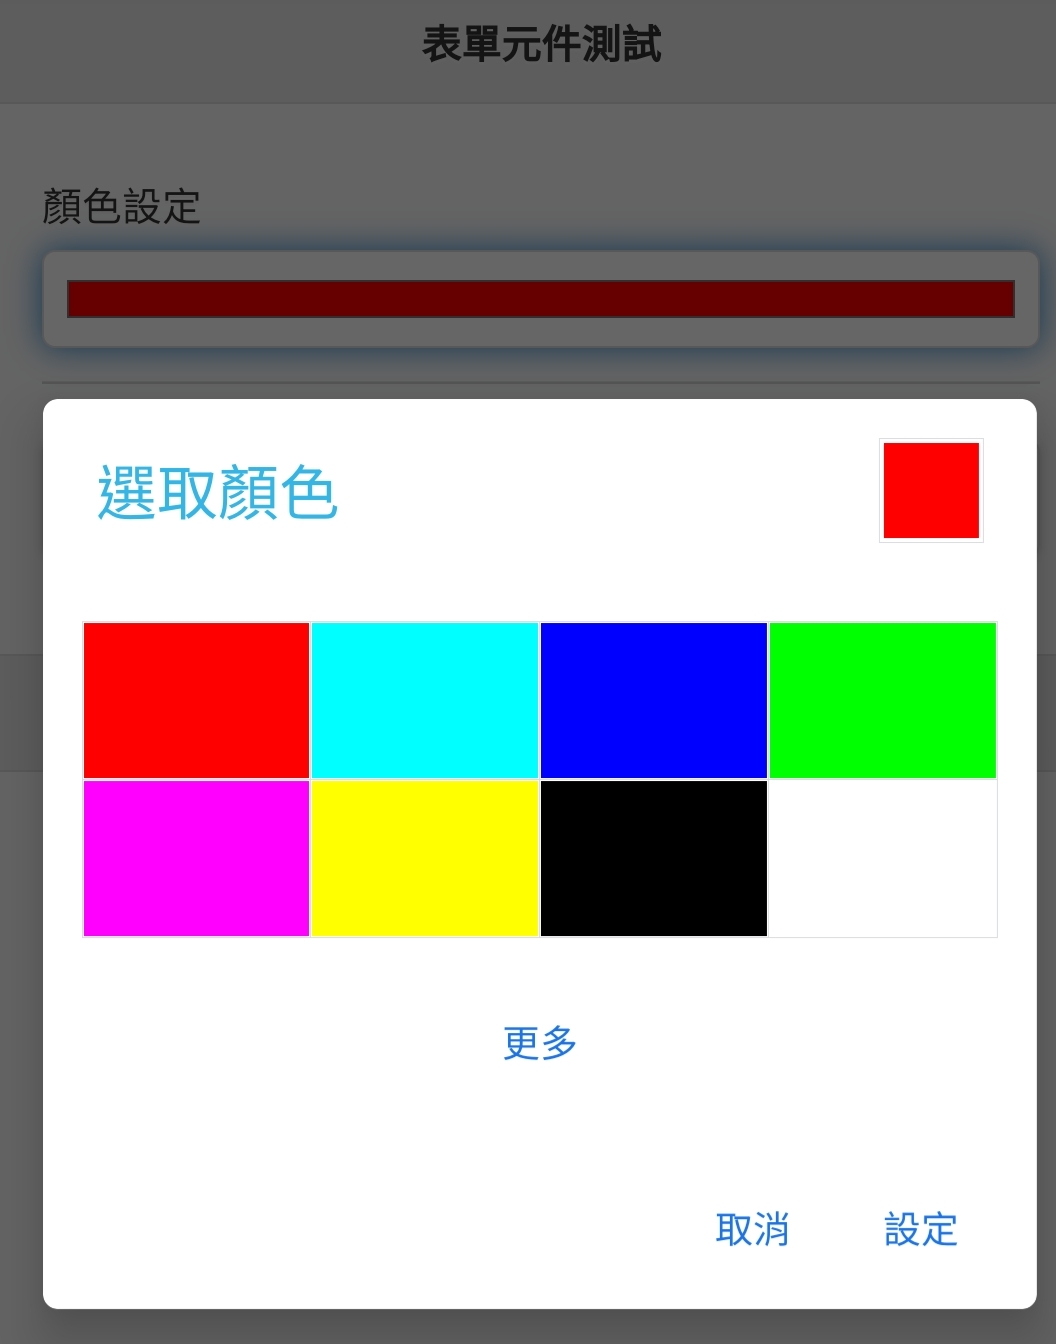
日期元件在行動 App 中很常用, 例如在日曆中設定提醒等等. 下面範例使用 HTML5 原生的 input[type=date] 元素 :


測試 4-1 : HTML5 原生的日期元件 input[type=date] [看原始碼]

<!DOCTYPE html>
<html>
  <head>
    <title></title>
    <meta charset="utf-8">
    <meta http-equiv="cache-control" content="no-cache">
    <meta name="viewport" content="width=device-width,initial-scale=1">
    <script src="https://code.jquery.com/jquery-1.11.1.min.js"></script>
    <script src="https://code.jquery.com/mobile/1.4.5/jquery.mobile-1.4.5.min.js"></script>
    <link href="https://code.jquery.com/mobile/1.4.5/jquery.mobile-1.4.5.min.css" rel="stylesheet">
  </head>
  <body>
    <!-- 第一頁頁面 -->
    <section data-role="page" id="page1">
      <header data-role="header">
        <h1>表單元件測試</h1>
      </header>
      <article data-role="content">
        <form method="post" action="http://tony1966.xyz/test/jqmtest/form_test_4_1.php">
          <div data-role="fieldcontain">
            <label for="set_date">日期設定</label>
            <input type="date" id="set_date" name="set_date">
          </div>
          <button id="ok_btn">確定</button>
        </form>
      </article>
      <footer data-role="footer">
        <h3>頁尾</h3>
      </footer>
      <script>
        $(document).on("pageinit", "#page1", function(e) {
          $("#ok_btn").on("click", function(e) {
            this.form.submit();
            });
          });
      </script>
    </section>
  </body>
</html>

結果如下 :


點日期欄位輸入框會彈出一張日曆供選擇日期, 按設定預設會以 YYYY-MM-DD 日期格式字串填入日期欄位中 :


按確定提交表單給後端程式 form_test_4_1.php 處理, 其內容為 : 

<!DOCTYPE html>
<html>
  <head>
    <title></title>
    <meta charset="utf-8">
    <meta http-equiv="cache-control" content="no-cache">
    <meta name="viewport" content="width=device-width,initial-scale=1">
    <script src="https://code.jquery.com/jquery-1.11.1.min.js"></script>
    <script src="https://code.jquery.com/mobile/1.4.5/jquery.mobile-1.4.5.min.js"></script>
    <link href="https://code.jquery.com/mobile/1.4.5/jquery.mobile-1.4.5.min.css" rel="stylesheet">
  </head>
  <body>
    <!-- 第一頁頁面 -->
    <section data-role="page" id="page1">
      <header data-role="header">
        <h1>表單元件測試</h1>
      </header>
      <article data-role="content">
      <?php
        $msg="設定日期=".$_REQUEST["set_date"];
        echo $msg;
      ?>
      </article>
      <footer data-role="footer">
        <h3>頁尾</h3>
      </footer>
    </section>
  </body>
</html>


此例網址 QR code 如下 :


此例我請姊姊用她的 iPhone 的 Safari 瀏覽器測試結果為 : 


不同瀏覽器繪製的外觀不一樣. 我在參考書籍 No.1 "jQuery Mobile 智慧型手機程式開發" 這本書的第九章看到 datebox 外掛的介紹, 這是一家叫 JTSage 的公司開發的, 參考 :

使用此外掛需下載相關 Javascript 函式庫, databox 提供了許多日曆模式 (mode), 需配合選用之模式匯入不同函式庫, 例如下面是 mode=datebox 所需之函式庫 :

<script src="http://cdn.jtsage.com/datebox/latest/jqm-datebox.core.min.js"></script>
<script src="http://cdn.jtsage.com/datebox/latest/jqm-datebox.mode.datebox.min.js"></script>

在 input[type=date] 元素上可用 data-options 屬性設定日期格式, 例如 :

<input type="date" id="set_date" name="set_date" data-role="datebox" data-options='{"mode": "datebox", "dateFormat": "YYYY-MM-DD", "fieldsOrderOveride": ["y", "m", "d"]}'>

下面是根據書本範例與 GitHub 說明進行測試之結果 :


<!DOCTYPE html>
<html>
  <head>
    <title></title>
    <meta charset="utf-8">
    <meta http-equiv="cache-control" content="no-cache">
    <meta name="viewport" content="width=device-width,initial-scale=1">
    <script src="https://code.jquery.com/jquery-1.11.1.min.js"></script>
    <script src="https://code.jquery.com/mobile/1.4.5/jquery.mobile-1.4.5.min.js"></script>
    <link href="https://code.jquery.com/mobile/1.4.5/jquery.mobile-1.4.5.min.css" rel="stylesheet">
    <script src="http://cdn.jtsage.com/datebox/latest/jqm-datebox.core.min.js"></script>
    <script src="http://cdn.jtsage.com/datebox/latest/jqm-datebox.mode.datebox.min.js"></script>

  </head>
  <body>
    <!-- 第一頁頁面 -->
    <section data-role="page" id="page1">
      <header data-role="header">
        <h1>表單元件測試</h1>
      </header>
      <article data-role="content">
        <form method="post" action="http://tony1966.xyz/test/jqmtest/form_test_4_1.php">
          <div data-role="fieldcontain">
            <label for="set_date">日期設定</label>
            <input type="date" id="set_date" name="set_date" data-role="datebox" data-options='{"mode": "datebox", "dateFormat": "YYYY-MM-DD", "fieldsOrderOveride": ["y", "m", "d"]}'>
          </div>
          <button id="ok_btn">確定</button>
        </form>
      </article>
      <footer data-role="footer">
        <h3>頁尾</h3>
      </footer>
      <script>
        $(document).on("pageinit", "#page1", function(e) {
          $("#ok_btn").on("click", function(e) {
            this.form.submit();
            });
          });
      </script>
    </section>
  </body>
</html>

此例在 PC 的 Chrome 上測試結果如下 : 


但在 Android 手機卻跟上面範例 4-1 一樣, 在 iPhone 的 Safari 測試亦是如此, 也就是說無效. 此例網址 QR code 如下 : 


接下來測試時間輸入元件, 即 input[type=time] 元素 : 


測試 4-3 : HTML5 原生的時間元件 input[type=time] [看原始碼]

<!DOCTYPE html>
<html>
  <head>
    <title></title>
    <meta charset="utf-8">
    <meta http-equiv="cache-control" content="no-cache">
    <meta name="viewport" content="width=device-width,initial-scale=1">
    <script src="https://code.jquery.com/jquery-1.11.1.min.js"></script>
    <script src="https://code.jquery.com/mobile/1.4.5/jquery.mobile-1.4.5.min.js"></script>
    <link href="https://code.jquery.com/mobile/1.4.5/jquery.mobile-1.4.5.min.css" rel="stylesheet">
  </head>
  <body>
    <!-- 第一頁頁面 -->
    <section data-role="page" id="page1">
      <header data-role="header">
        <h1>表單元件測試</h1>
      </header>
      <article data-role="content">
        <form method="post" action="http://tony1966.xyz/test/jqmtest/form_test_4_3.php">
          <div data-role="fieldcontain">
            <label for="set_time">時間設定</label>
            <input type="time" id="set_time" name="set_time">
          </div>
          <div data-role="fieldcontain">
            <button id="ok_btn">確定</button>
          </div>
        </form>
      </article>
      <footer data-role="footer">
        <h3>頁尾</h3>
      </footer>
      <script>
        $(document).on("pageinit", "#page1", function(e) {
          $("#ok_btn").on("click", function(e) {
            this.form.submit();
            });
          });
      </script>
    </section>
  </body>
</html>

在 Android 手機測試結果如下 : 


內圈是 hour, 外圈是 minute, 按設定會將設定值填入時間框內 : 


按確定提交給後端程式 form_test_4_3.php, 其內容為 : 

<!DOCTYPE html>
<html>
  <head>
    <title></title>
    <meta charset="utf-8">
    <meta http-equiv="cache-control" content="no-cache">
    <meta name="viewport" content="width=device-width,initial-scale=1">
    <script src="https://code.jquery.com/jquery-1.11.1.min.js"></script>
    <script src="https://code.jquery.com/mobile/1.4.5/jquery.mobile-1.4.5.min.js"></script>
    <link href="https://code.jquery.com/mobile/1.4.5/jquery.mobile-1.4.5.min.css" rel="stylesheet">
  </head>
  <body>
    <!-- 第一頁頁面 -->
    <section data-role="page" id="page1">
      <header data-role="header">
        <h1>表單元件測試</h1>
      </header>
      <article data-role="content">
      <?php
        $msg="設定時間=".$_REQUEST["set_time"];
        echo $msg;
      ?>
      </article>
      <footer data-role="footer">
        <h3>頁尾</h3>
      </footer>
    </section>
  </body>
</html>


此例網址 QR code :


在 iPhone 測試顯示之時間設定畫面如下 : 


如果要日期與時間同時設定, 必須用 datetime-local, 用 datetime 無效, 參考 :


<!DOCTYPE html>
<html>
  <head>
    <title></title>
    <meta charset="utf-8">
    <meta http-equiv="cache-control" content="no-cache">
    <meta name="viewport" content="width=device-width,initial-scale=1">
    <script src="https://code.jquery.com/jquery-1.11.1.min.js"></script>
    <script src="https://code.jquery.com/mobile/1.4.5/jquery.mobile-1.4.5.min.js"></script>
    <link href="https://code.jquery.com/mobile/1.4.5/jquery.mobile-1.4.5.min.css" rel="stylesheet">
  </head>
  <body>
    <!-- 第一頁頁面 -->
    <section data-role="page" id="page1">
      <header data-role="header">
        <h1>表單元件測試</h1>
      </header>
      <article data-role="content">
        <form method="post" action="http://tony1966.xyz/test/jqmtest/form_test_4_4.php">
          <div data-role="fieldcontain">
            <label for="set_time">時間設定</label>
            <input type="datetime-local" id="set_datetime_local" name="set_datetime_local">
          </div>
          <div data-role="fieldcontain">
            <button id="ok_btn">確定</button>
          </div>
        </form>
      </article>
      <footer data-role="footer">
        <h3>頁尾</h3>
      </footer>
      <script>
        $(document).on("pageinit", "#page1", function(e) {
          $("#ok_btn").on("click", function(e) {
            this.form.submit();
            });
          });
      </script>
    </section>
  </body>
</html>

結果如下 : 


按設定會將所選日期時間填入文字欄位內 : 


按確定會向後端程式 form_test_4_4.php 提交表單, 其內容如下 : 

<!DOCTYPE html>
<html>
  <head>
    <title></title>
    <meta charset="utf-8">
    <meta http-equiv="cache-control" content="no-cache">
    <meta name="viewport" content="width=device-width,initial-scale=1">
    <script src="https://code.jquery.com/jquery-1.11.1.min.js"></script>
    <script src="https://code.jquery.com/mobile/1.4.5/jquery.mobile-1.4.5.min.js"></script>
    <link href="https://code.jquery.com/mobile/1.4.5/jquery.mobile-1.4.5.min.css" rel="stylesheet">
  </head>
  <body>
    <!-- 第一頁頁面 -->
    <section data-role="page" id="page1">
      <header data-role="header">
        <h1>表單元件測試</h1>
      </header>
      <article data-role="content">
      <?php
        $msg="設定日期時間=".$_REQUEST["set_datetime_local"];
        echo $msg;
      ?>
      </article>
      <footer data-role="footer">
        <h3>頁尾</h3>
      </footer>
    </section>
  </body>
</html>

結果如下 : 


此例網址 QR code :


關於 HTML5 的時間與日期相關元件還有 week 與 month, 為了節省篇幅, 我將它們整合在下列範例中測試 : 


<!DOCTYPE html>
<html>
  <head>
    <title></title>
    <meta charset="utf-8">
    <meta http-equiv="cache-control" content="no-cache">
    <meta name="viewport" content="width=device-width,initial-scale=1">
    <script src="https://code.jquery.com/jquery-1.11.1.min.js"></script>
    <script src="https://code.jquery.com/mobile/1.4.5/jquery.mobile-1.4.5.min.js"></script>
    <link href="https://code.jquery.com/mobile/1.4.5/jquery.mobile-1.4.5.min.css" rel="stylesheet">
  </head>
  <body>
    <!-- 第一頁頁面 -->
    <section data-role="page" id="page1">
      <header data-role="header">
        <h1>表單元件測試</h1>
      </header>
      <article data-role="content">
        <form method="post" action="http://tony1966.xyz/test/jqmtest/form_test_4_5.php">
          <div data-role="fieldcontain">
            <label for="set_week">周次設定</label>
            <input type="week" id="set_week" name="set_week">
          </div>
          <div data-role="fieldcontain">
            <label for="set_month">月份設定</label>
            <input type="month" id="set_month" name="set_month">
          </div>
          <div data-role="fieldcontain">
            <button id="ok_btn">確定</button>
          </div>
        </form>
      </article>
      <footer data-role="footer">
        <h3>頁尾</h3>
      </footer>
      <script>
        $(document).on("pageinit", "#page1", function(e) {
          $("#ok_btn").on("click", function(e) {
            var msg="周次=" + $("#set_week").val() + "\n" + 
                    "月份=" + $("#set_month").val();
            alert(msg);
            this.form.submit();
            });
          });
      </script>
    </section>
  </body>
</html>

結果如下 : 


按確定會向後端程式 form_test_4_5.php 提交表單, 其內容如下 : 

<!DOCTYPE html>
<html>
  <head>
    <title></title>
    <meta charset="utf-8">
    <meta http-equiv="cache-control" content="no-cache">
    <meta name="viewport" content="width=device-width,initial-scale=1">
    <script src="https://code.jquery.com/jquery-1.11.1.min.js"></script>
    <script src="https://code.jquery.com/mobile/1.4.5/jquery.mobile-1.4.5.min.js"></script>
    <link href="https://code.jquery.com/mobile/1.4.5/jquery.mobile-1.4.5.min.css" rel="stylesheet">
  </head>
  <body>
    <!-- 第一頁頁面 -->
    <section data-role="page" id="page1">
      <header data-role="header">
        <h1>表單元件測試</h1>
      </header>
      <article data-role="content">
      <?php
        $msg="設定周次=".$_REQUEST["set_week"]."<br>".
             "設定月份=".$_REQUEST["set_month"];
        echo $msg;
      ?>
      </article>
      <footer data-role="footer">
        <h3>頁尾</h3>
      </footer>
    </section>
  </body>
</html>


此例網址 QR code :